
I’ve written and talked a lot about FIDO2 and passkeys for the last couple of years now, but it seems like many people find it really hard to get started with it. So I want to write a quick and easy post on simply how to get started with FIDO2 keys for either a pilot group or all your accounts in Entra ID. This guide will focus on physical FIDO2 keys, like the one depicted below.

📢 Since the purpose of this post is to be a quick guide to get started, I will intentionally skip many settings for fine-tuning or security hardening. The goal here is to help people get started with FIDO2 keys for Entra ID authentication.
About Temporary Access Pass (TAP)
Why do we involve TAP? TAP is designed as a onboarding-method! This is because MFA is always required first, in order to register a FIDO2 key. Since a new user account does not have MFA, they need a temporary MFA method they can use so they can register their FIDO2 key. This is the sole purpose of TAP.
Since you only need to know the TAP and the username to gain complete control over an account, your TAP short have a short duration and be set to one-time usage.
What do you need?
Before we get started using FIDO2 keys, you need the following:
- One or more users in Entra to get started with
- A security group for these users (either an existing group or create a new one), if you don’t want to scope it to all users
- Enable FIDO2 in “Authentication Methods” for the relevant group (or all users)
- Enable Temporary Access Pass (TAP) in “Authentication Methods” for the relevant group (or all users)
- A physical FIDO2 key delivered to the user
Getting started – High level steps
- Enable FIDO2 and TAP in the tenant
- Generate TAP for the user
- User receive their physical FIDO2 (and TAP if applicable)
- User sign in to aka.ms/mysecurityinfo and register FIDO2 key
- User now use FIDO2 key for signing in
Getting started – detailed steps
1. Enable FIDO2 (and TAP) in the tenant
Be aware that enabling a method in Authentication Methods only enables it as an option for the end user. It does not set the method as a requirement for the user.
- Sign in as admin to entra.microsoft.com and navigate to Authentication Methods

- Locate Passkey (FIDO2) and enable it for either all users or your pilot group
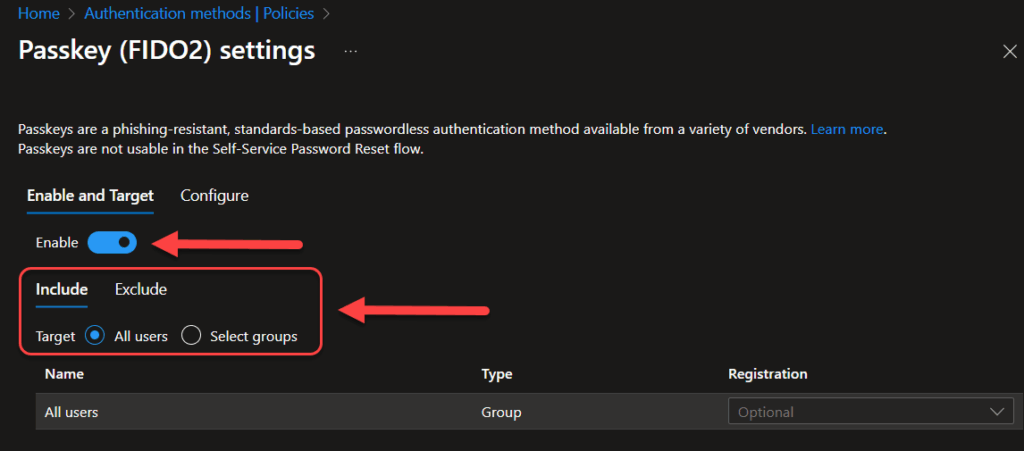
- Under Configure, make sure that Allow self-service set up is enabled and notice if Key restrictions is enabled, it will block specific FIDO2 key models from being used

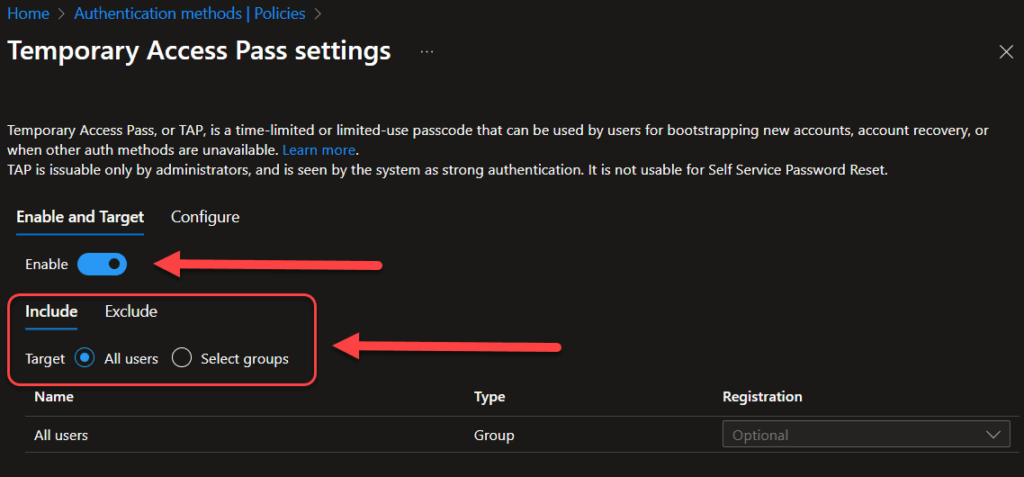
- Save and return to the Authentication Methods screen
- Enter the Temporary Access Pass settings and enable it like you did with FIDO2, either all users or your pilot group.
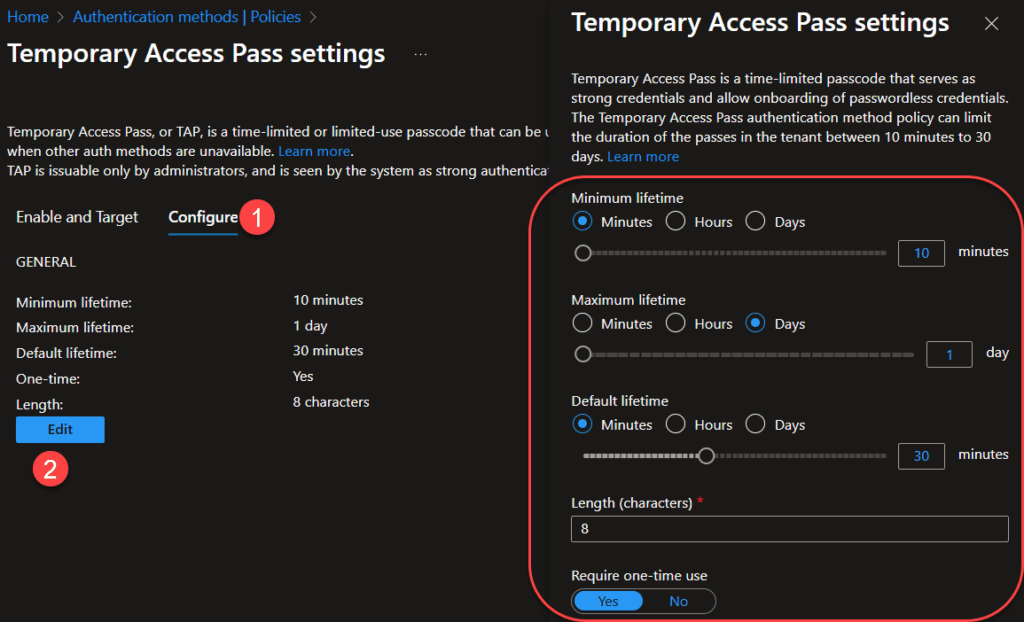
- Under Configure you can change length and lifetime of a TAP, and I like to enforce One-time usage of TAP because this is only an onboarding-method and is not meant to be used an alternative to MFA.
2. Generate a TAP for the user
If the user does not have an existing MFA method, they need a TAP to get started.
Sign in to Entra ID, open the properties of the user – Authentication methods – Add authentication method – Temporary Access Pass and select Add at the bottom
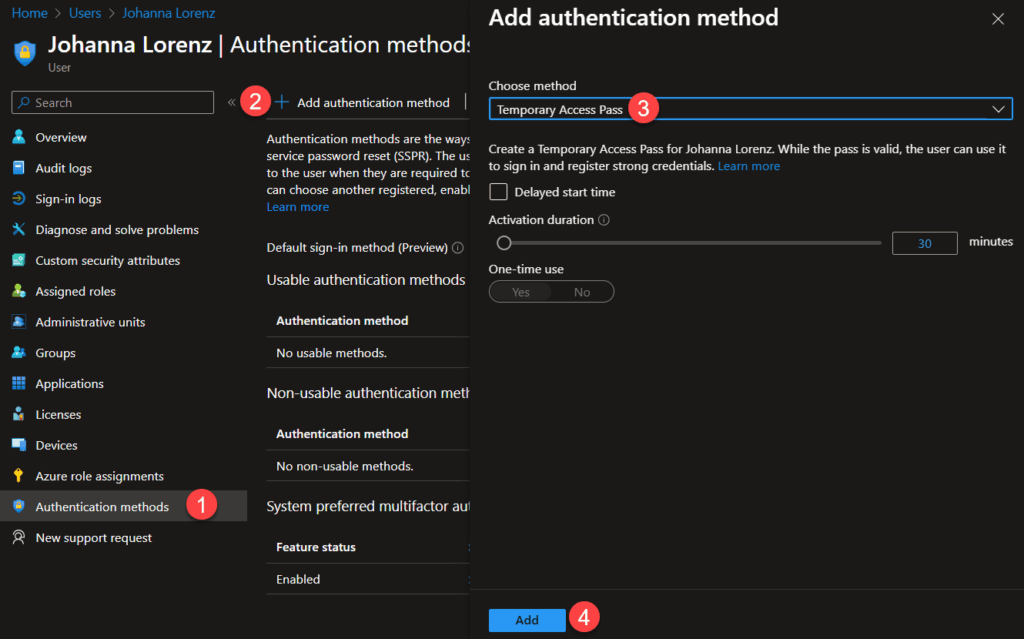
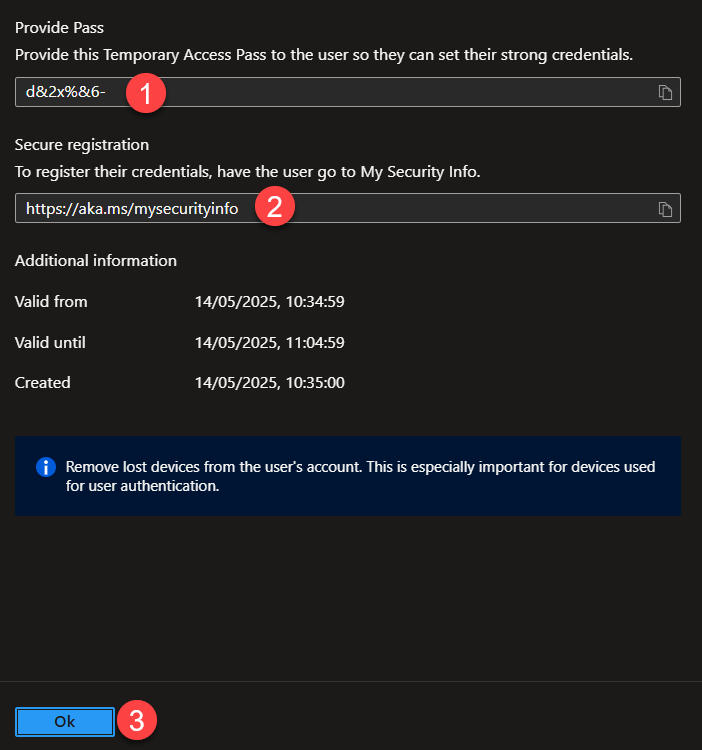
You will now see the value of the TAP – make sure to copy it because it will not be shown again. You also get the link which the end-user should use to register their FIDO2 key. Press OK at the bottom when done. Notice that the TAP is only usable for a specific amount of time!
3. Provide user with a physical FIDO2 key (and TAP)
This is a non-technical part but nevertheless your organization must have a plan on how to securely provide users with a FIDO2 key and their TAP if needed. Take a good look at how you provide new users with their username and passwords. 😱 Are you just texting them their info over SMS?
Remember, without MFA, an account is just an open invitation for hijackers. You need to make sure passwords, TAP, and any other sensitive information get sent securely to the user. Most experts already agree that SMS isn’t secure enough for MFA, and by that logic, I would argue it’s not safe for sending passwords, TAP, or similar details either. This is a logistical challenge which must be taken seriously.
❗Just to underscore how important it is that the TAP is transmitted securely: Any user who has the TAP and knows/guesses the username are free to log in as that user and configure their own MFA methods! They don’t need to know the password!
4. Self-service setup of FIDO2 by the end-user
So the user has securely received their FIDO2 key and TAP.
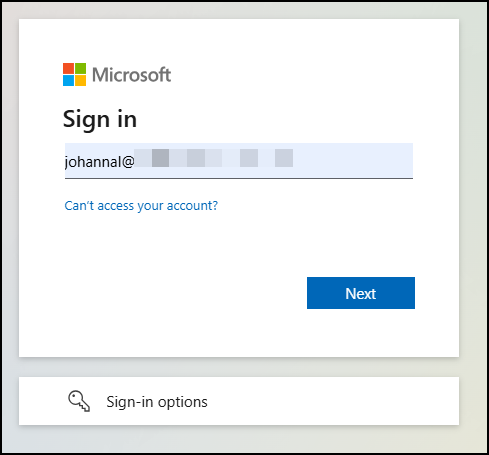
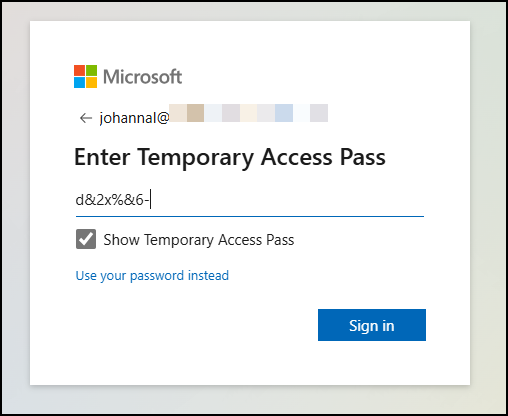
Now the user signs in to aka.ms/securityinfo using their username and TAP.
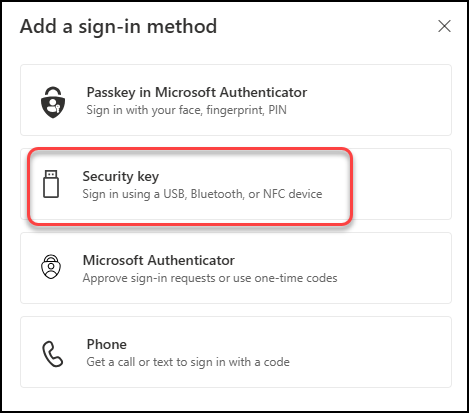
At the Security info screen: Select Add sign-in method
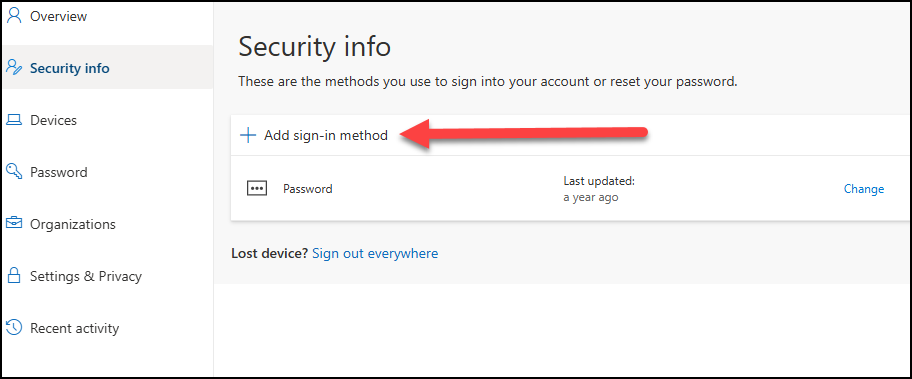
Select Security key and follow the wizard. The steps may differ slightly from system to system.
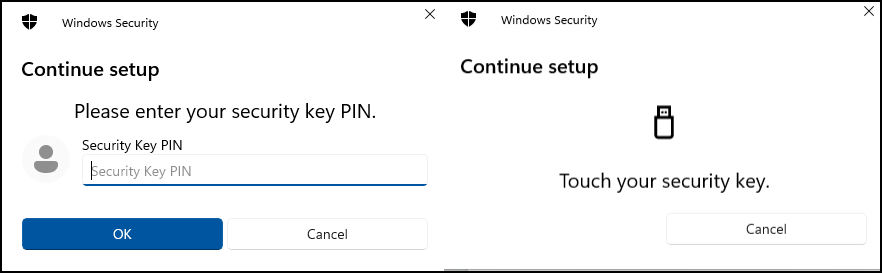
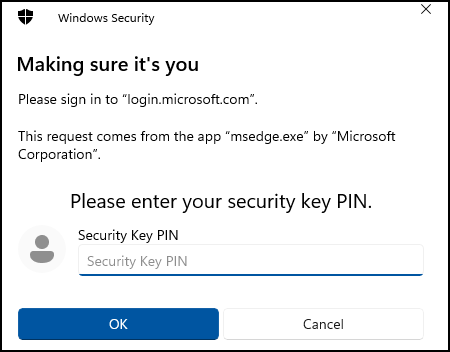
Make sure your FIDO2 key is connected and select Security key as placement for the passkey. Then set the PIN code for the key and touch it to verify that it is in your proximity. Again these step may be slightly different in your environment and key model.
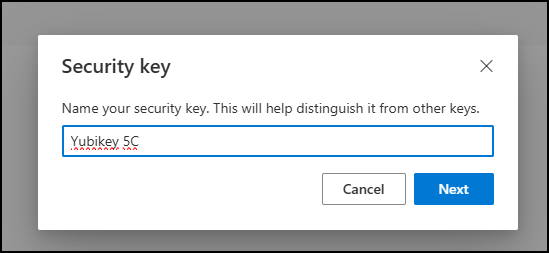
You should get a message that it has been created successfully and the last step is to give it a name so you can easily recognize it.
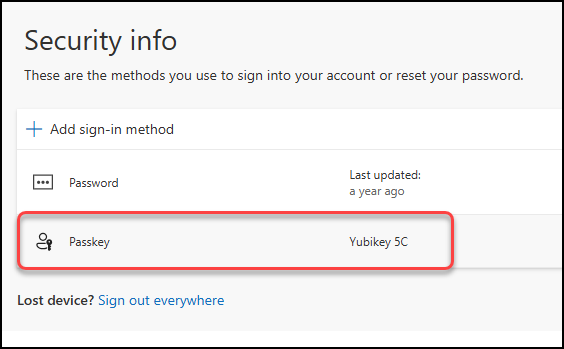
And it should now be visible in your Security info screen.
5. Sign in using FIDO2
Final step is to test the FIDO2 key. When you sign in to Entra ID, notice a new option Use your face, fingerprint, PIN, or security key instead. Select this instead of typing your password.

Select Security key on the popup screen.

Enter the PIN code set previously and touch it to verify your proximity.
🥳 You are now signed in using the FIDO2 key (and no passwords).
Conclusion (and a bonus tip)

As you can see: Getting started with FIDO2 keys is straightforward! There’s no need for complicated setups or endless tinkering. With just a few configuration changes (enabling both FIDO2 and Temporary Access Pass in Entra ID), distributing your physical keys, and letting users complete a simple sign-in process, you’re ready to switch from passwords and insecure MFA methods to a secure, easy-to-use and modern authentication method.
If you haven’t already made the move, don’t wait! FIDO2 keys are a fast, effective way to boost your security while simplifying user access. It is a win-win!
Bonus tip:
As an alternative to this. Admins can use PowerShell to set up a FIDO2 key on behalf of another user. This means you, as admin, can set up a security key and deliver it to the user in question, along with the PIN-code to use it! All the information you need is right here: https://agderinthe.cloud/2024/11/04/security-made-easy-pre-provision-fido2-keys-for-your-users-with-powershell/
Author

Discover more from Agder in the cloud
Subscribe to get the latest posts sent to your email.