
In my last post, Get Copilot ready(-ish) – with Microsoft Purview, I talked about the basic and easy way for a starting point to get Copilot or AI ready, and this beeing the next step after access, I would now like to show how you can get started with Labels and document classification. Please look at Per-Torbens post about Entra ID to read more about access.
Please be advised that you should have a fairly good understanding of the type of information your organization is already using before you set up labels.
All right, let’s get to it!
Before you begin, those pesky admin roles and licenses…
You need to make sure that you have the following roles assigned in Microsoft 365:
- Global Administrator (NEVER EVER give Global admin without it being completely necessary, so NO – skip to next admin role)
- Compliance Administrator – Least privileged and remember to use PIM
These roles will grant you full permissions to create and manage sensitivity labels. And to make the most of Microsoft Compliance – labels and retention policies, make sure that you have E5 or A5, or E5 Compliance license.
To get started, go to Compliance Manager:
- Go to Compliance Manager and sign in.
- In the navigation pane, choose Information Protection and Labels.
- You will see the predefined labels Personal, Public, General, Confidential and Highly Confidential.
- Label details: Click on a label and select edit to see what the label can do, change label colour and description.
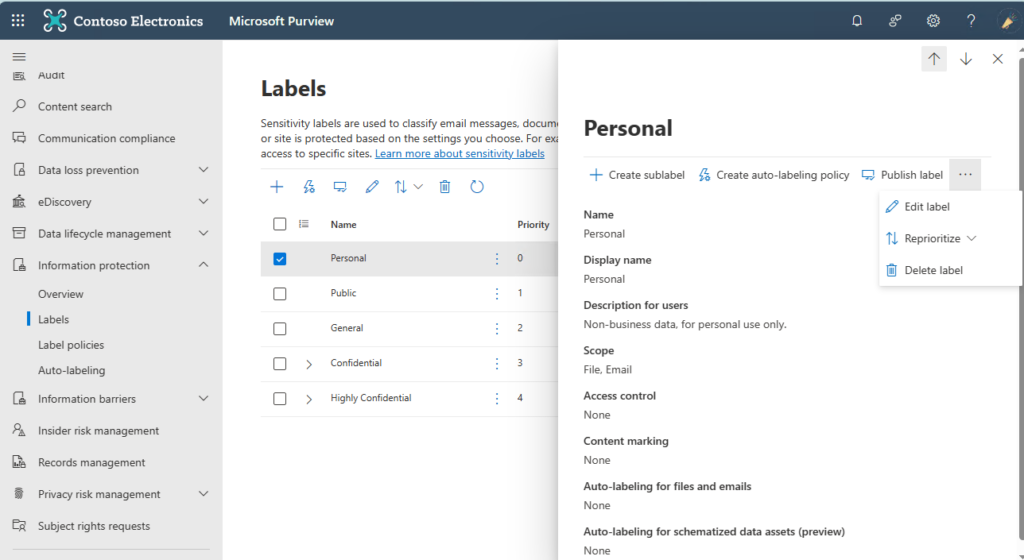
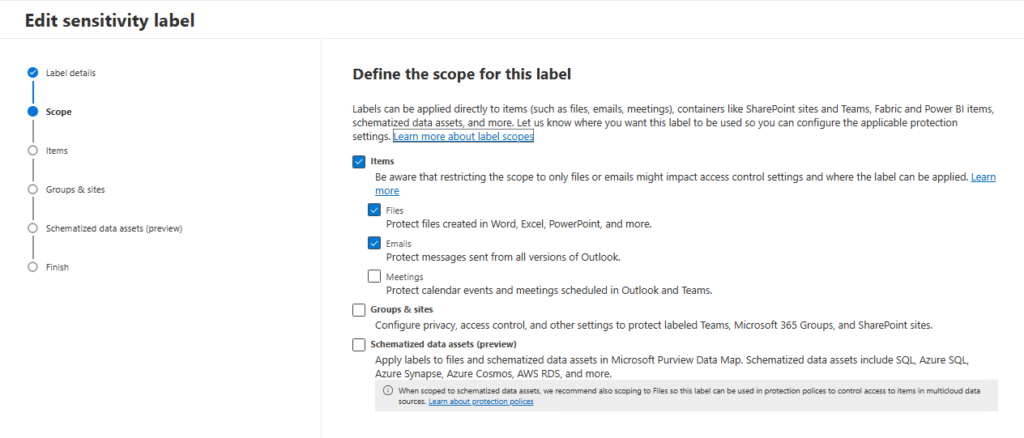
- Scope: Define scope for the label and where it can be applied.
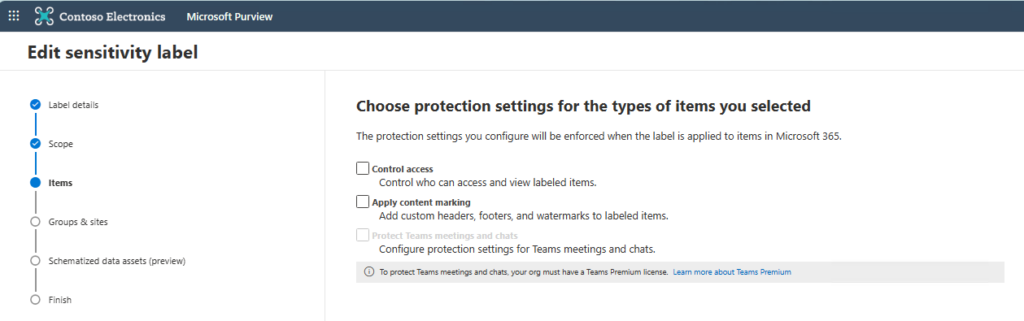
- Items: Settings for the types of items you selected, where you can control access. You can also choose to apply content marking e.g. add custom headers or footers.
I do strongly recommend that this is not done to other labels than the Highly confidential label. The content marking will be added as extra text on a file and that will appear untidy.
- Auto-labelling for files and emails – add this to files that are sensitive and need extra protection. And I would recommend leaving the choice of label up to the users and all other types of files.
- Groups and sites: You can add labels to groups and sites to control sharing and access from said groups and sites.
Congratulations, you have made information labels!
But they are not published to the users just yet, so you need to take these steps as well:
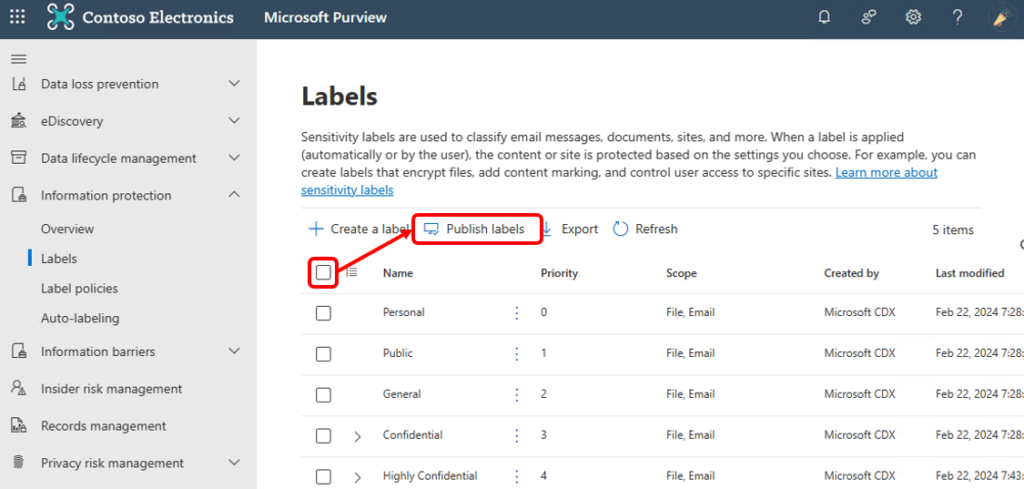
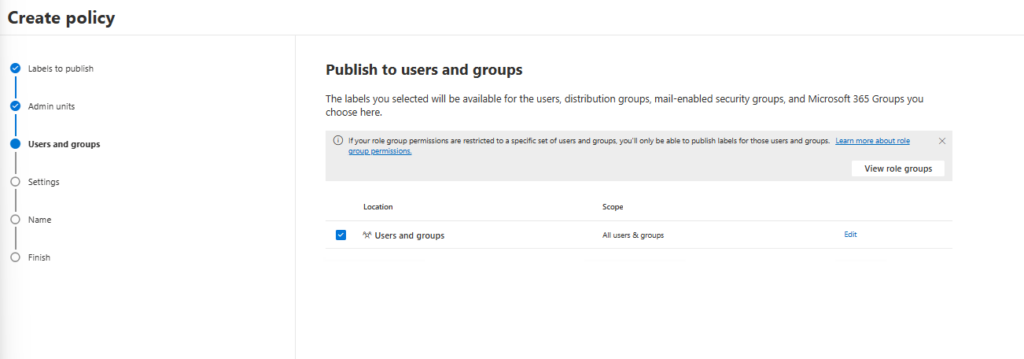
- Publish labels: Choose the labels to publish and click on Publish or just Publish labels.
You will then go through a policy where you can add users and groups to which the labels should be published. Please do a pilot on this before publishing to everyone. That makes life easier for everyone!
- Policy settings: This section allows you to customize your label settings. I find the options “User must provide a justification to remove or lower its classification” and “Require users to apply a label to their emails and documents” particularly useful. These settings offer users the opportunity to explain their reasons for changing labels, enabling you to reassess the labels in the future.
Do not enforce a default label!
If this is done, labels will be automatically applied to the files without providing users a choice, which may lead to a lack of ownership feeling towards the labeling process. And without having the choice when files are saved, the users won’t see the choices they have regarding labelling.
Other than that, follow the wizard down the yellow brick road, and give your policy and a good and understandable name, and please remember to add a good description!
Remember that a lot of tests at one point stops being tests and go live – with the test name..
Now, you are ready for pilots to test out labelling! Good luck – and in my next post I will guide you through retention policies! Doesn’t that sound like a hoot!
Author
Discover more from Agder in the cloud
Subscribe to get the latest posts sent to your email.