Welcome back to my posts on Entra ID PIM!
- In part 1, I explained what PIM is and how it works
- In part 2 I walked through a proof-of-concept setup with Entra ID roles assigned to groups.
As some of you might have noticed, Copilot for M365 has arrived and it is available to all M365 customers! Now that might be awesome and fun and the beginning of something revolutionary, but now we all need to have a even keener eye on security and access control. Especially when it comes to admin rights and activating elevated privileges through PIM…
Copilot – The spy of all spies! 😱

For many years now, I’ve always followed and recommended the important principle of having separate and dedicated accounts for administrative tasks. You should never give administrative access to the account you use every day for work (Email, meetings, working with documents etc), but instead use a separate, dedicated account. So to follow that principle, I say you should NEVER assign any licenses for Office 365 applications, including copilot, to your separate and dedicated administrator-account, because that account should never be used to read/write e-mail, join meetings or access files. For practical matters: Email alerts from Entra ID can be sent to a shared mailbox, or you can set up email forwarding to a normal account. Use whatever solution that works for you.
But why is this so important? Why am I nagging about this? The reason why is that with Copilot for M365, anything you have access to, will be added to its semantic index to be used to provide relevant responses to your prompts. This means that all the information a user account gets access to when elevated through PIM, may be indexed by Copilot and may show up in responses. As far as I can tell, Microsoft has neither confirmed nor denied this consequence. But copilot is a hot topic and we get new information almost every day.
So if there was still any doubt about best practices, this is the final proof in my opinion.
Again: I will strongly recommend to ALWAYS use a separate account for any and all elevated privileges in your tenant/subscription and NEVER assign any Office 365-related licenses, including Copilot, to those accounts! The importance of security and access control cannot be overstated!
Accessing the portal and view your roles
I will go through the elevation process with a user (Lidia H) who is an ordinary user eligible for the group “PIM – INT – Exchange administrator” which I created in part 2. Membership in the group will provide her access to the Exchange online admin role. This account should, as mentioned above, be a dedicated account for administrator tasks only.
First of all: Access the Entra portal and navigate to the role assignment. Keep in mind that the Entra ID portal may be restricted for ordinary user accounts to browse as there is a dedicated setting for it.If this setting is activated, the user can’t browse to the elevation page. They must instead use the direct link to it. Link: My roles – Microsoft Entra admin center. If this is the case in your environment, I suggest publishing this direct link to the relevant user accounts in one way or another.
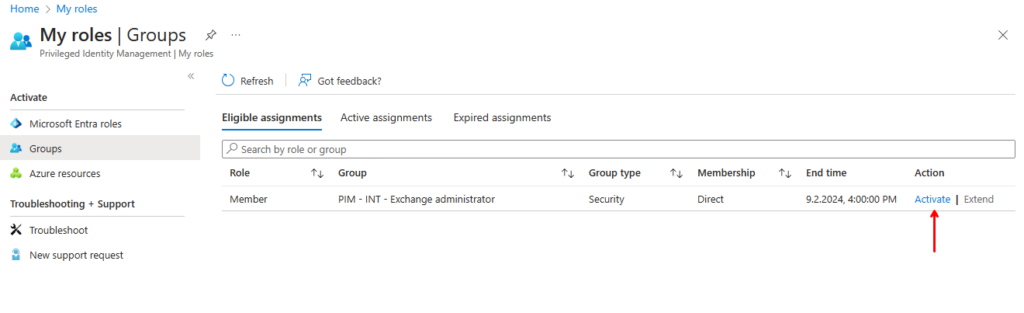
This will open this screen where you can see the groups you are eligible to elevate into. Click on “Activate” to start the elevation process:
Activate your available roles or groups
A new box appears on the right side. Here you must enter some information to proceed. The elevation attempt will also check any MFA requirements, and if needed, prompt you for MFA verification. More on that later. Keep in mind that the options here will depend on the settings you selected when creating the delegation. See part 2 for more info.
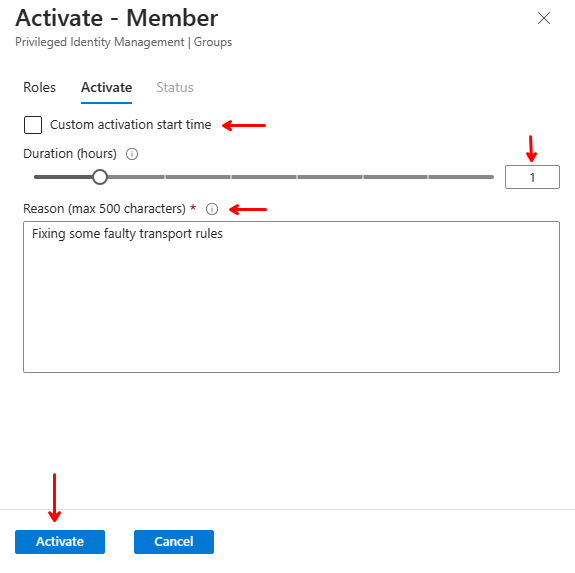
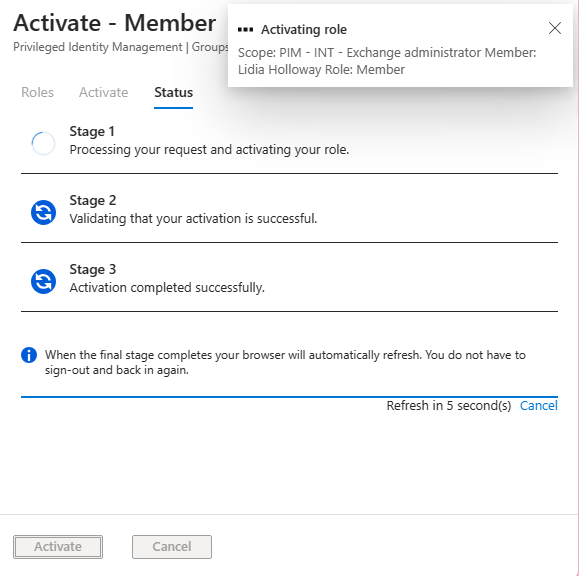
In this example I can select when the activation begins and how long it will last, up to 4 hours as I set in part 2. Also I must provide a reason for the elevation to proceed. The reason will appear in the e-mail notifications and log. Here I’ve set the membership to begin immediately and last for 1 hour with the justification that I need to fix some faulty transport rules in Exchange. When done, click “Activate” on the bottom and wait a few seconds while the elevation works. The screen will refresh automatically when completed.
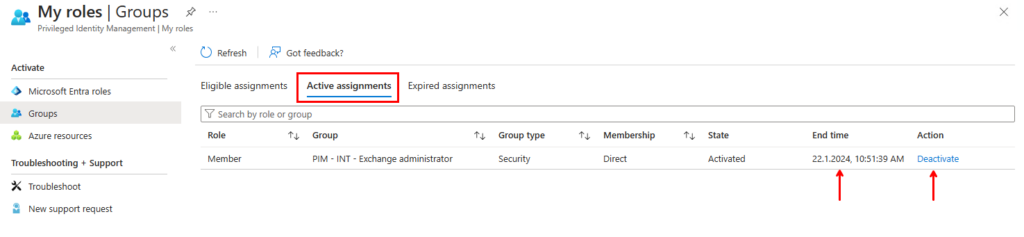
Now under “Active assignments” we can see that the membership is “Active”, when it expires and an option to deactivate the elevation early if needed.
Lidia can now open the Exchange Online admin portal and do the tasks she needs to do. Note that if you’re going to use PowerShell you need to activate the elevation before you log in.
This is the end for now, in the final part I will explore more how PIM can be made more secure and how you can perform logging and troubleshooting.
Author

Discover more from Agder in the cloud
Subscribe to get the latest posts sent to your email.