
Welcome back! In part 1, I explained what PIM is and how it works, and here in part 2 I’ll walk you through a setup and share my insights and opinions along the way.
The implementation in this post is a proof-of-concept only and should NOT be implemented as-is. Always plan, discuss, adjust and test which setup suits you and your environment before you begin implementing PIM.
Step 1 – what to protect?
When you log in to the Entra ID portal, you will find “Privileged Identity Management” under “Identity Governance” on the left side and you immediately see the 3 areas when PIM can work: “Microsoft Entra roles“, “Groups” and “Azure resources”
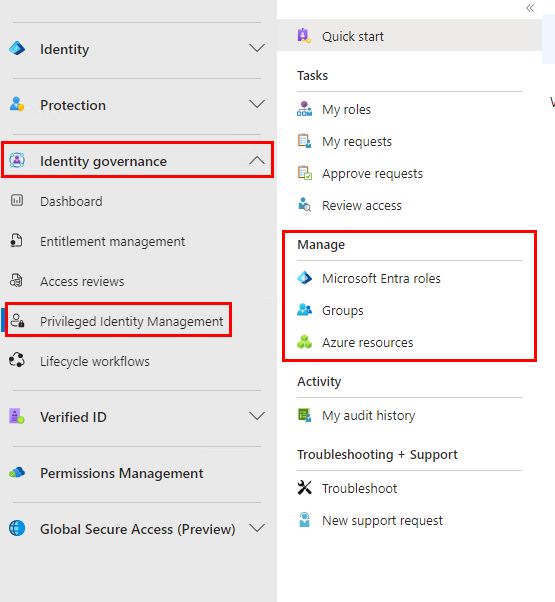
Since we’ve been talking about delegating roles in Entra ID, it’s quick to assume “Microsoft Entra roles” is the next step here, but it is not. I would, unless there’s a very specific reason not to, always select “Groups” here.
Step 2 – Select “Groups” because it’s awesome
So, traditionally you would select “Microsoft Entra roles” in the screen above and begin delegation of a role. However this method has several shortcomings which groups doesn’t. A common example of using groups instead of individual permissions is on a fileserver, and you might think that PIM works the same way. That’s true, but you (hopefully) don’t have to assign permissions to so many people in your organization that this becomes a problem. The real advantages of using groups are:
- You can group together several roles in one group, elevating all roles in that group at once.
- You can easily provide different criteria/settings for different people, for the same role.
So to elaborate a little: If you for example try to delegate administration of Microsoft Teams, then one role will not cut it. Depending of which tasks you need to perform in Teams, you may need:
- “Teams administrator” (for Teams adminportal and teams-specific settings)
- and/or
- “Sharepoint Online administrator” (for the Sharepoint components in Teams)
- and/or
- “Exchange Online administrator” (O365 groups which Teams is built upon is primarily managed in Exchange Online).
So because Teams expands into several areas, elevating only to “Teams Administrator” still doesn’t allow you to do many tasks within Teams management. Grouping these three roles together, makes it possible for one elevation to activate all three roles, and reduces the annoyance for the delegated user, who will otherwise have to do multiple elevations.
Remember in part 1 I mentioned how important it is that the staff is loyal to this system? Multiple elevations to perform one task is the kind of annoyance which makes many admins wish for PIM to fail miserably, and that is something we definitely want to prevent. Again: A successful PIM implementation requires the admins and delegated users to remain faithful to the implementation. Some admin rights makes it easy to remove or bypass these features which are meant to add protection.
Another example is your customer/end-user support staff. They will often need several roles, depending slightly on how far they are allowed to troubleshoot. For example: “User administrator” allows most user-related tasks. Change password, assign licence, add to group etc. But it does not allow them to read the sign-in log, which is crucial to troubleshoot sign-in issues. So you may also want to allow them access to the “Security Reader” role which gives read-only access to sign-in logs and most of your security settings (like your Condition Access rules) for better troubleshooting. You must of course decide if you should give them access to these roles, remember this is a proof-of-concept only.
As for point 2 above: Using groups lets you set different criteria per role by using several groups. Typically, you trust an employee more than an external consultant (like me). So by delegating through groups, you can apply more limitations on the external consultant for the same role, compared to an employee who has the same role. That’s so awesome!
This post will assume you use groups to delegate permissions
Step 3 – If applicable: Create the PIM-groups in Entra ID.
If you want to use groups for delegation through PIM (which this demo assumes), the first step is to create the relevant groups in Entra ID.
It is important to toggle the switch “Microsoft Entra roles can be assigned to the group” here. This setting is permanent and cannot be changed and it can only be set when the group is created. You can also add the roles to the group when the group is created but this can be changed later if needed.
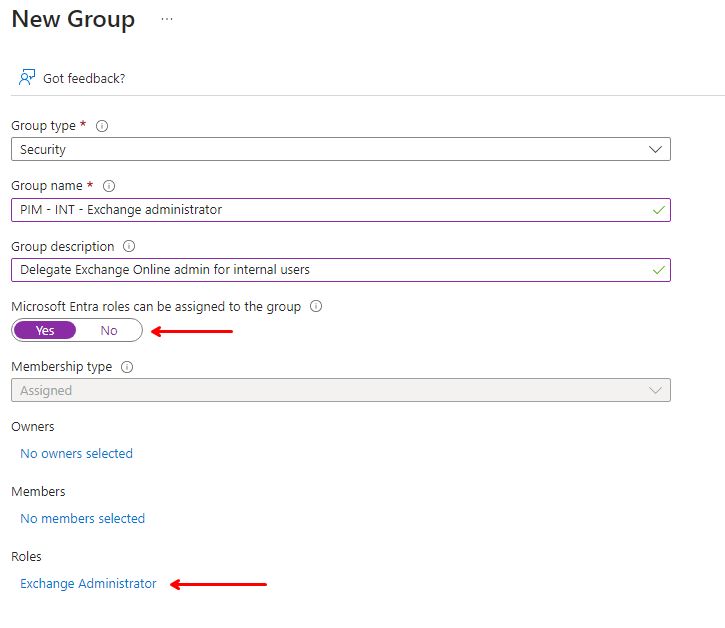
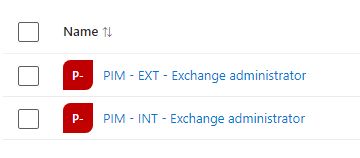
For demo purposes I’ve created two groups to delegate the role Exchange administrator for internal or external users, with the Exchange Administrator role delegated to it.
Step 4 – Prepare PIM groups for assignments
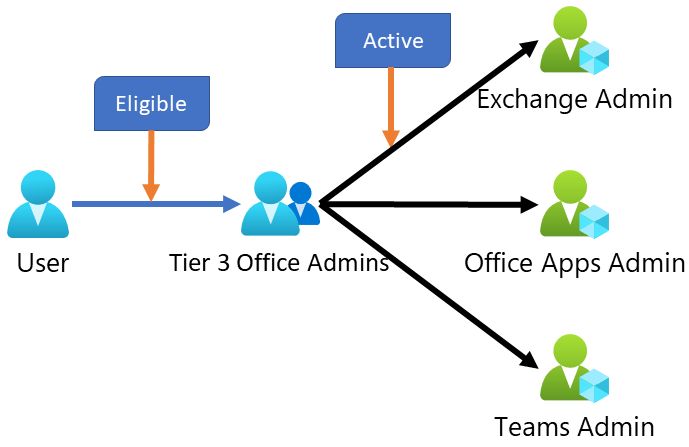
Eligible vs Active
Before we proceed we need to clarify what “eligible” and “active” means.
- “Eligible” means someone has the same accesses as before, but they can activate an elevation through PIM for additional access for a limited time.
- “Active” is an active permission, exactly as assigning “Exchange administrator” role directly to the user account, the old-fashioned way.
In principle this solution will work like this: A group in Entra ID is actively assigned to one or more roles. Users are then made eligible to join the group as a group member and inherit the roles assigned to the group when they activate their membership.
Assign a user eligibility to a group
First step is to navigate to Entra ID, and then “Groups“, locate and open the relevant group, select “Privileged Identity Management” on the left side and click the button “Enable PIM for this group” in the middle.
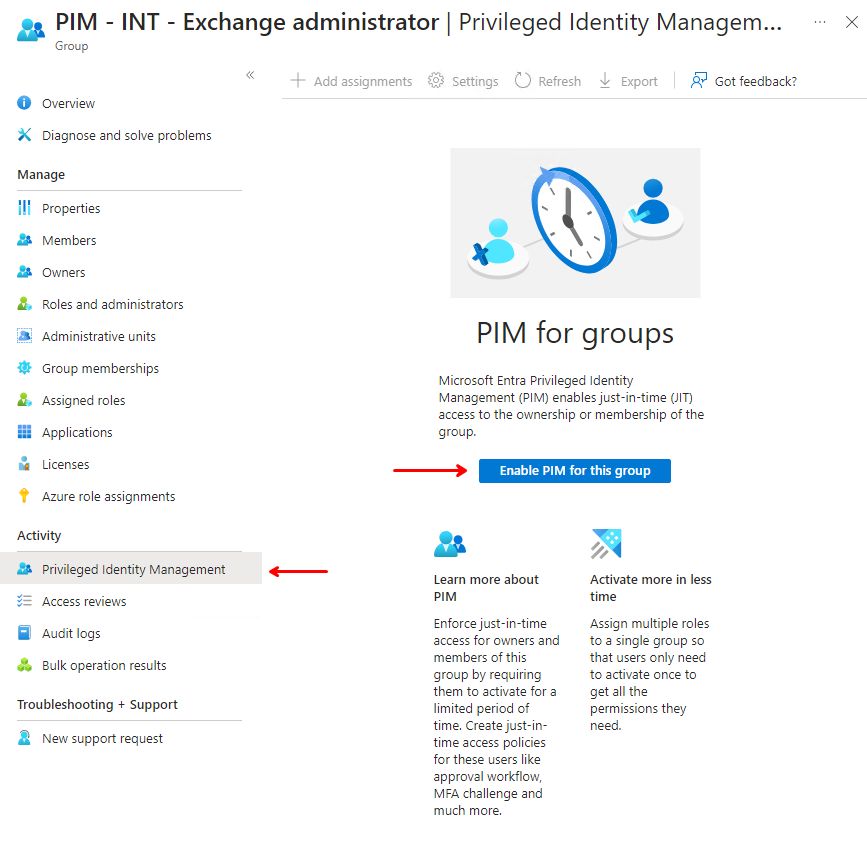
The screen should change slightly and present new options in the top. Locate and click on “settings“.
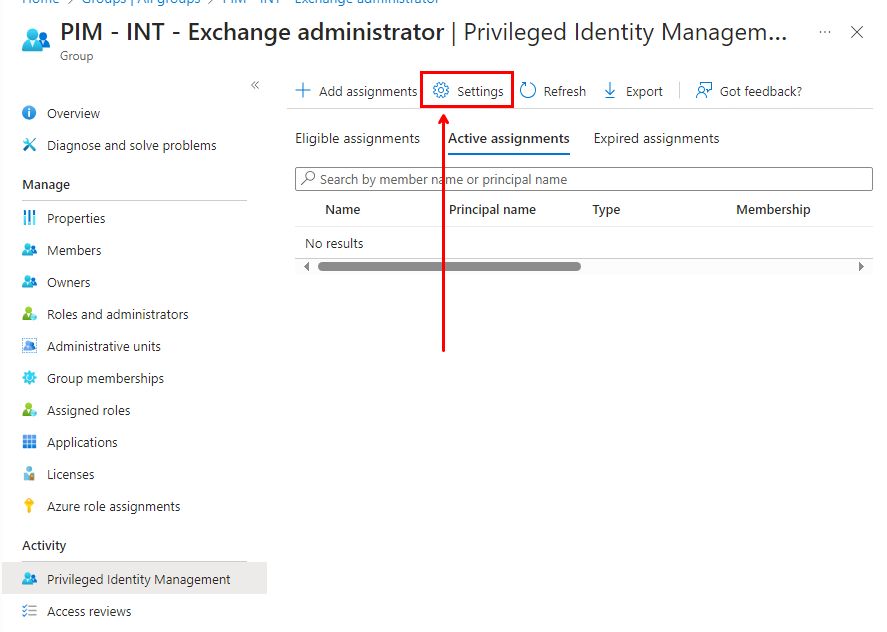
Select “Member” on the next screen and you will be presented with some settings to review and customize, here are the default values:
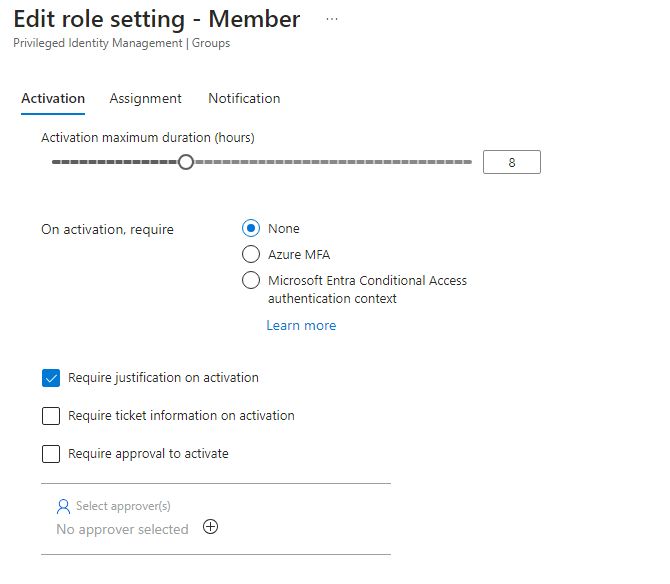
Here you see the “activation” screen.
- Activation maximum duration of the elevation, where you might want to consider shorter time for some critical roles, like Global Admin, and perhaps also shorter time for external consultants.
- On activation, require: Azure MFA is a minimum requirement if you ask me, but you can boost your security here by using “Microsoft Entra Conditional Access authentication context”. I will walk through that in a later post, stay tuned.
- Both “Require justification on activation” and “Require ticket information on activation” are both plain text fields (no integration to various ticket systems). The purpose is to document a justification for why the elevation happens and reference any support ticket number, if applicable.
- If you need to control when the elevation occurs, you can consider to enable “Require approval to activate” and assign an approver in your tenant who must approve all elevation requests for this group. This will require a person to approve the elevation request before it goes into effect, just keep in mind this can result in significant delays if the approver is unavailable or otherwise busy. So use this option with caution and always use more than 1 approver for redundancy.
Moving on to “Assignment”, and again you can see the default values for how long an assignment can last.
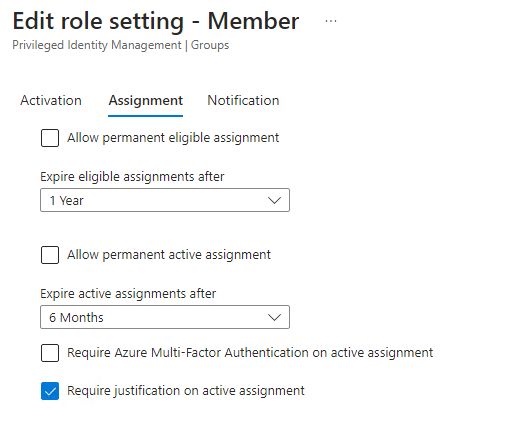
Notice that permanent assignment for both “Eligible” and “Active” assignment are off by default, and I would strongly suggest to keep it that way. I prefer to assign eligible roles for either 6 or 12 months at the time (also for the internal IT admins), to make sure access will be removed if not renewed. Users will be able to request renewal of the assignment 14 days before they expire, so you shouldn’t have to worry about having to keep track of this on their behalf.
How long an assignment should last is something you need to decide for yourself. Active assignments breaks the “Just in Time” component of PIM, so I normally don’t use that feature. A major part of PIM is that privileged access in not enabled all the time, so to me this is the exception form the rule.
On the next screen we have “Notification“.
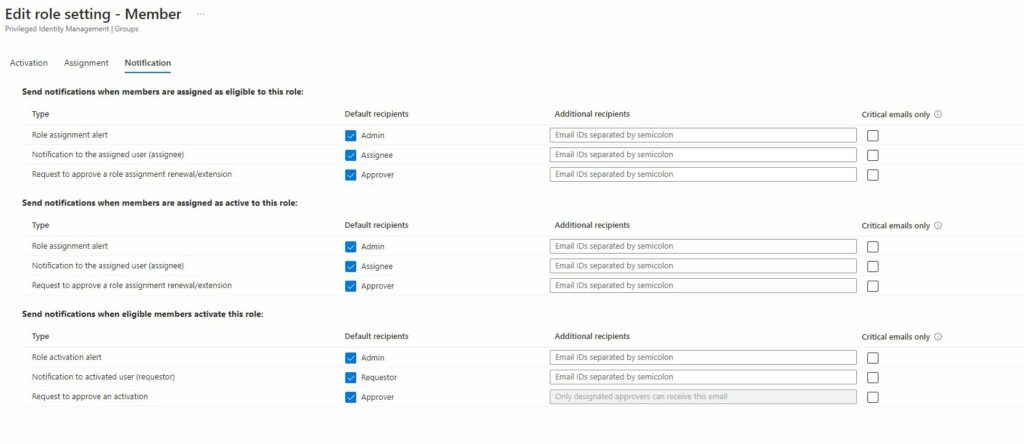
This screen is slightly confusing and I’ll explain why I think so. It has 3 sections which are pretty self-explanatory:
- Send notifications when members are assigned as eligible to this role
- Send notifications when members are assigned as active to this role
- Send notifications when eligible members activate this role
So far, so good. However look at the default recipients. This is where it becomes ambiguous and confusing, but they are documented here
- In this context: Who is “Admin”?
- “Request to approve a role assignment renewal/extention”: Who is “Approver”?
- Which notification qualifies under the option “Critical emails only”?
I do not normally recommend admin accounts to have O365 licenses applied, mainly to keep the attack surface as small as possible. So e-mails sent to admin accounts may not end up anywhere or may bot be read. So I will normally have those emails sent to whatever solution the IT admins currently use. (Shared mailbox, CRM, Teams channel, whatever the case may be). So the setup will be something like this:
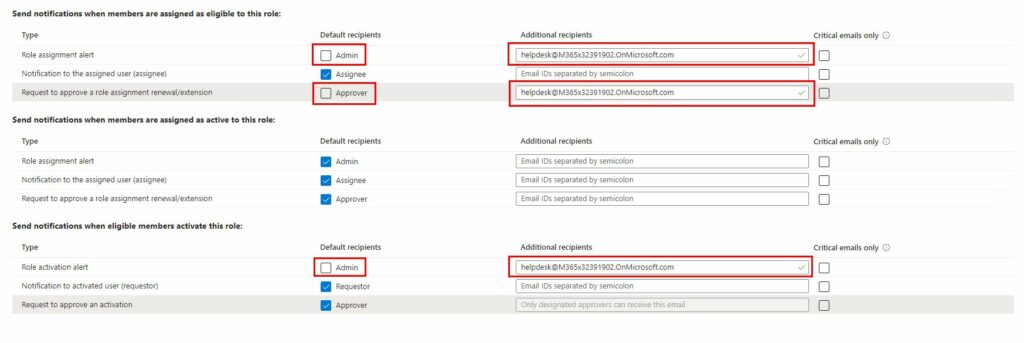
My point is that your implementation must adapt to whatever is available in your environment.
When all settings are done, click on “update” in the bottom left and you are ready to assign user accounts as eligible members of the group.
Step 5 – Assign users to PIM groups
Now we are finally ready to assign users to the group in order to let them activate privileged access.
In Entra ID: Navigate to “identity Governance” – “Privileged Identity Management” – “Groups” and click on the relevant group.
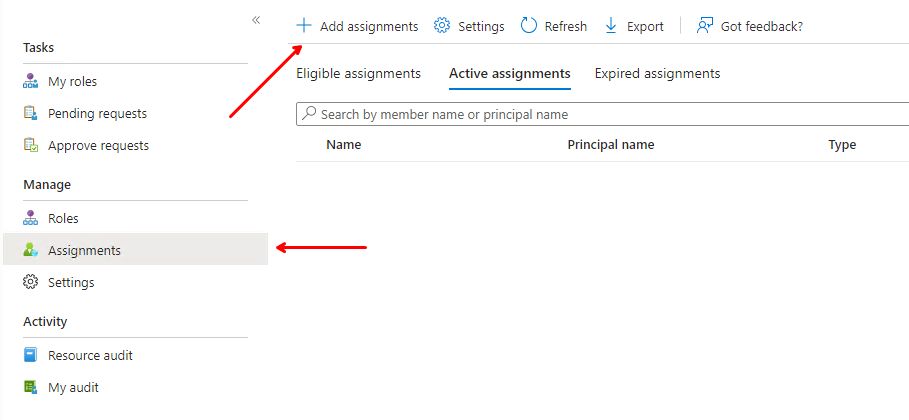
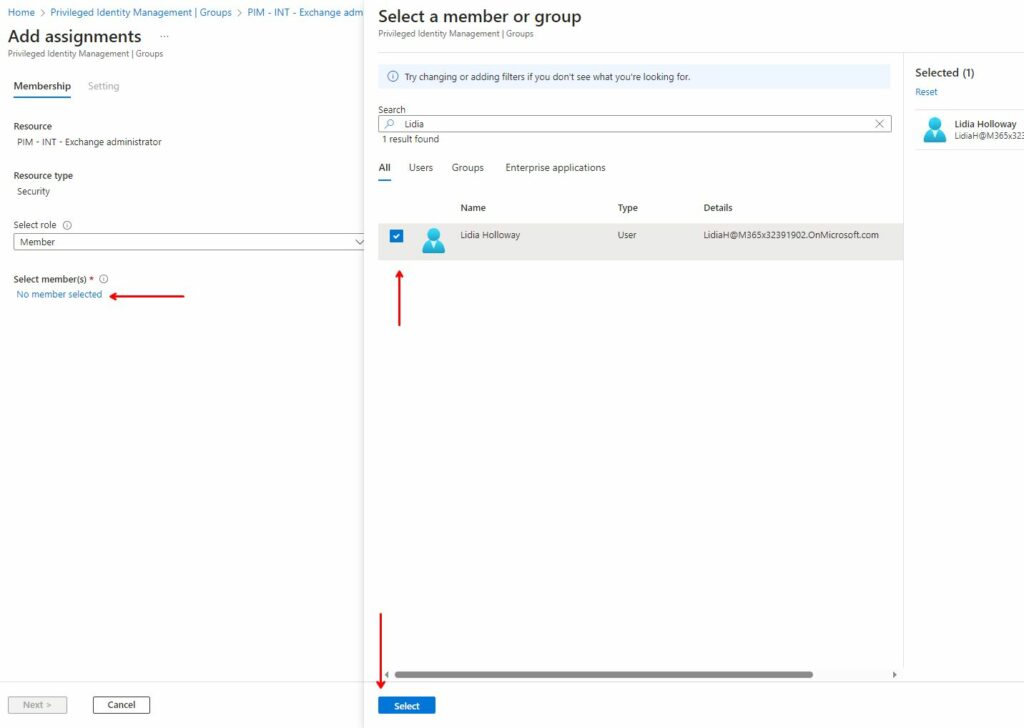
Select “Assignments” on the left side and then “Add assignments” on the top
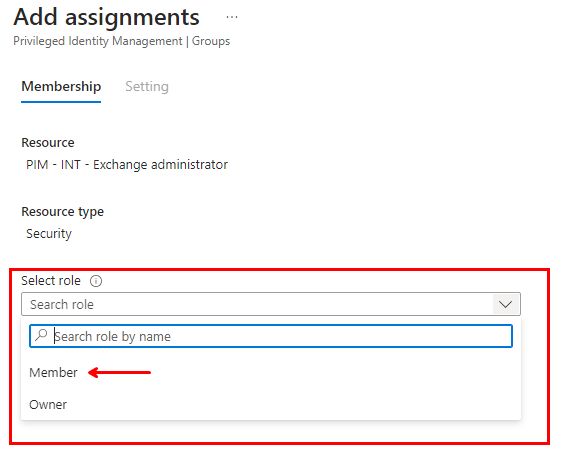
In the new screen, under “Add assignments”, make sure you click on “Select role” and select “Member“.
Then click “No member selected” below and search and select, on the right side, the users you want to delegate the role to. In this case we select Lidia Holloway in our demo-tenant, and click “Next”
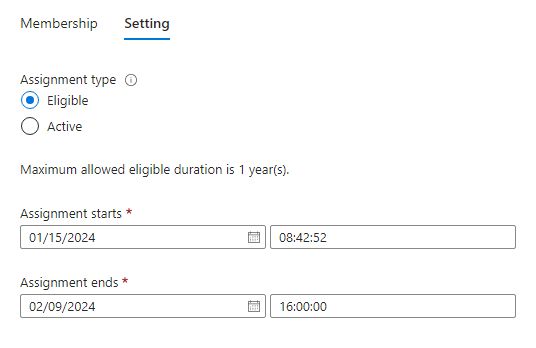
Next we select if the user is “Eligible” (he/she must activate the role before each time it is used) or “Active” (the role is constantly active until expiration). Normally we want to select “Eligible” and set when the assignment expires. The default value is 1 year unless you changed the value in Step 4 in this guide. I will, for demo purposes, set it to expire on the 9th of February which is just over 3 weeks from when this post is written.
Now just click “Assign” at the bottom and you will now see the user under “Eligible assignments” along with start and end time on the assignment you just set.

Congratulations! You now have a group which is enabled for PIM and ready to use by your delegated user.
This is it for time post, but stay tuned because in part 3 I will go through the activation process for the delegated user and some tips and tricks along the way.
Until next time.
Author

Discover more from Agder in the cloud
Subscribe to get the latest posts sent to your email.